Tuesday, April 22, 2008
Primer & Paint
I have finally reached a point where I can primer and paint the main body of the cab. I sanded each layer of paint with very fine paper before putting on the next coat. One coat of primer and two coats of color was the final count. I just used an acrylic based paint and applied it with a foam roller (works awesome) and a foam sponge on a stick thingy. I would defiantly recommend the foam roller as it leaves the smoothest, most consistent finish next to spraying the thing. The black paint is a satin gloss and the green is a high gloss paint. The high gloss really reflects light so you better wear your Mavericks while applying this stuff! As you can see in some of the upclose photos it kinda plays with the light a bit and makes it appear dimpled or bendy (throught the plexiglas on the sub window for example), but it seems perfectly smooth in real life. I painted the entire inside of the cab black because I plan on lighting it up inside a bit and thought it'll look cool.

MDF clothing
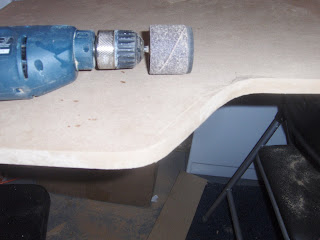
After getting the sides and frame together it was time to fill in the with MDF and wood filler. I had originally decided that I was going to include Wii into the MAME so I cut out a spot for it to slide into right under the control panel. I drilled two holes on the back side of the panel so I can just stick a couple of pencils into them to get the Wii out easily if I ever need to.
I designed the sub box for the speaker that I have not bought yet. In the meantime I'm testing it out with an old Cerwin Vega I had lying around. I sealed the box with PL400 and installed a speaker quick connect terminal to clean things up a bit. I set the speaker hole back a bit and at an angle so I can install a Plexiglas window that you can look in and see the sub, lights, etc... I thought it would kind of dress it up a bit, plus I'm a big fan of lighting.
Friday, April 18, 2008
Woofer Testing (metal pancakes)
So, the myth is that you can power a sub using a PC power supply. Well... let's see if I can electrocute myself.
I don't want to go into too many details but basically you have to strip an inch or so off of all yellow and black wires and connect them together (not all together! yellow wires together as a bundle, then do the same with black).
Obviously (to some of us), the 12 volt (yellow bundle) will connect to the 12 volt on the amp and the black bundle (ground wires) will connect to the ground on the amp. Now that that fun is over, we get to wake this lazy amp up. In order to do this, you have to cut the green wire that goes into the 24 pin connector (big plug that connects to your motherboard) and connect it with one of the adjacent big thick black wires on the same connector. Now, as you can see below, put a jumper wire from the remote on the amp to the 12 volt and once you turn on your power supply(s) your amp should either go up in a blaze of glory, smell like fresh toast or be ready to beat some tracks. Hopefully the latter. Be careful! Don't use my brief tutorial as a guide because their are many other things you must take into consideration or you will be killing parts right and left. I don't want to be responsible for wasting people's money, unless it's at a bar.

Everything seemed to have worked out perfect. Dance Party!
I don't want to go into too many details but basically you have to strip an inch or so off of all yellow and black wires and connect them together (not all together! yellow wires together as a bundle, then do the same with black).
Obviously (to some of us), the 12 volt (yellow bundle) will connect to the 12 volt on the amp and the black bundle (ground wires) will connect to the ground on the amp. Now that that fun is over, we get to wake this lazy amp up. In order to do this, you have to cut the green wire that goes into the 24 pin connector (big plug that connects to your motherboard) and connect it with one of the adjacent big thick black wires on the same connector. Now, as you can see below, put a jumper wire from the remote on the amp to the 12 volt and once you turn on your power supply(s) your amp should either go up in a blaze of glory, smell like fresh toast or be ready to beat some tracks. Hopefully the latter. Be careful! Don't use my brief tutorial as a guide because their are many other things you must take into consideration or you will be killing parts right and left. I don't want to be responsible for wasting people's money, unless it's at a bar.
Everything seemed to have worked out perfect. Dance Party!
Presents Galore!
I got a ton of stuff in the mail over the next few days. I think my mailman now hates me because he has to carry my packages along his route until he gets to my house (walking mailman).

I have to give Ultimarc major props for shipping so damn fast! From the UK to the US in three days on both shipments! Buy your stuff from Ultimarc.com, the best MAME cab products, fine company. I got a bunch of the cool chrome LED buttons and a couple UltraStik 360's for my panel. I got 40 feet of chrome t-molding from t-molding.com, which is super sweet and also a green trackball from, CHEAP! Awesome! I also ordered a bunch of stuff...Four handles for the two back doors that will be used to get at the PC, etc... from knobsandthings.com and also two stainless steel "poker table" style cup holders from pokersupply.com. They fit a 12 oz can perfect and I will be putting them in the control panel for easy access. I thought this style of cupholder would look a lot better that something hanging off the side like many google searches returned, plus they are friggin cheap comparatively. It's awesome being excited about cupholders.
And last but not least.... A 800 watt amp for the sub woofer that I plan to enclose in the front (where the coin door is supposed to go). Yes, I've decided to make this a MAME/Jukebox. However, my goal is to not let the jukebox interfere with MAME, it'll be more like playing some music while kicking some ass. It'll be cooler than it sounds if it works out, I'll tell you more as I go along. Note: If you read the "Intro to Mame em' Up" section, this is part of that suprise, getting any idea of what it might be yet?? (Sorry this is my sad attempt at creating suspense!)
It's awesome spending ton's money in the matter of a couple days... Till it's gone at least... This will probably be my favorite day until I'm actually playing on the thing.
Choppin' Wood
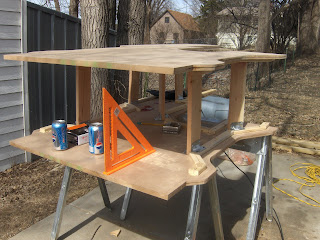
After a break in the weather, I was finally able to go outside and start chainsawing the frame (I don't have a garage).
After measuring everything out I decided to make a few small adjustments here and there, but overall I stuck to the original Visio plan.
I had to use a Jig saw on most of the frame because of the angles, however, I used and defiantly recommend using a circular saw anywhere straight edges matter.
Back outside. I used 1 x 6's to keep the sides together sturdy. Also I used a ton of angle brackets on each side to add extra support. There is no way this thing will ever flex.
I took a ton of time here to make sure that everything was perfectly straight and square. If something was slightly off I would fix it, because I know how much I will regret it if I don't later on down the road.
Visio Layout
I made up a quick (6 hour) visio drawing of the cab and control panel. Visio printed out the drawing really friggin weird so it took awhile to piece it together.

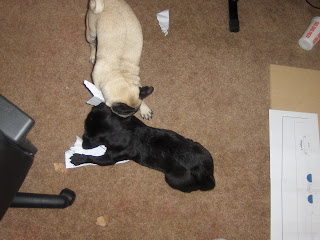
I was attacked by two wild animials during this phase. I barely made it out alive. My Visio drawing wasn't so lucky.

Here's the board laid out for easy drilling (Or so I thought)...

Just an FYI to anyone, apparently paper tears easy (who the hell would've guessed). So, when your drilling out your buttons with your 1 1/8" circle bit, chances are that that you may tear he heck out of adjacent buttons. So, if I hadn't spent so much time taping this this down, I would probably rip it off and bust out the measuring stick.

As you may have noticed, I did not use MDF for the control panel. The rest of my cab (that is not framing) is MDF. I did not want the panel to be too heavy because I thought it would make the weight dispursment a little awkward. Plus I plan to store a few controllers, etc... inside the control panel box (As you will see, once I build it), so it will be opened frequently. I might change my mind later on but we'll see how it goes.
I was attacked by two wild animials during this phase. I barely made it out alive. My Visio drawing wasn't so lucky.
Here's the board laid out for easy drilling (Or so I thought)...
Just an FYI to anyone, apparently paper tears easy (who the hell would've guessed). So, when your drilling out your buttons with your 1 1/8" circle bit, chances are that that you may tear he heck out of adjacent buttons. So, if I hadn't spent so much time taping this this down, I would probably rip it off and bust out the measuring stick.
As you may have noticed, I did not use MDF for the control panel. The rest of my cab (that is not framing) is MDF. I did not want the panel to be too heavy because I thought it would make the weight dispursment a little awkward. Plus I plan to store a few controllers, etc... inside the control panel box (As you will see, once I build it), so it will be opened frequently. I might change my mind later on but we'll see how it goes.
Intro To Mame Em' Up
This is my first MAME cabinet I have built. So far, I'm having a lot of fun with this project and I can't wait to finish this thing up. I've read a ton of posts on the BYOAC forums and am trying to take into account other Mamer's experiences (screw-up's) so that this process goes as smoothly as possible (...and inexpensively, more importantly). Much prop's to BYOAC and it's members! As I have done, I urge anyone interested and new to the Mame scene or planning their first build to spend a month or so researching and planning before building and ordering parts. These cab's are not cheap by the time you get finished, so try to think of everything you plan to do with your cab and design accordingly. the BYOAC site has everything you need to know, so use it!
The design of this cab originated around the fact that it had to be skinny enough to fit through the small doorway leading into the room where the MAME will remain. I love the style of showcase cabinets but their is no way that I would be able to fit one in and out of the door. As I am determined to get what I want, or at least close to what I want one way or another, I decided to create plans for something unique, that will fit the space allotted and also support all the bells and whistles. As this is my first MAME cab, and the house I live in currently will only fit one cab, I decided that I will go nuts on this one and do something with a "Modern" look to it, and will have everything I can drum up to pack into this thing. I figured instead of insulting mine and everyone else's love for the classic and original feel of arcade machines, I would go outside the bounds and design a cab to fit my ideas for this machine. So in all, I have decided I will have to wait to get my Primal Rage dream cab.
Half way though my designing process, someone pointed me to Taz's Mame Marvel cab. That thing is awesome! It seems that he is the inventor of the skinny cab design and would like to give him props on the awesome design! It seems that we were following a slightly similar thought process as far as 'skinny' cab, although mine was less sparked from creativity and more from the fact that 'I had too' :) As I am a firm believer in giving credit where it is deserved, I did use a couple of Taz's idea's on a couple portions of my cab. I used his Idea of a base for the cabinet and the control panel box. I do not think it is right to copy another's idea's but rather use them as reference to customize your own thought's to your liking; So as you can see in the photo's I modified these a bit.
I caught myself in the design process and relized that I should probably set the control panel back another six inches from the main body for use of the trackball with Golden Tee in an attempt to prevent broken fingers/screens while playing the game (this game will be played quite a bit on this machine). However, I think that it gives the cab a little more of a 'showcase' feel, so I am happy with this decision. UPDATE: Recently I have added on an additional plan to use a small portion of this space for a surprise that I will write about later on when the time comes. I'm really excited, hopefully someone else is out there too...I know my girlfriend isn't ;)
Playing Ketchup
I haven't had time recently to put together a blog showing the progress of my first MAME cab , now entitled "Mame Em' Up!", but I got the urge today, so the next few posts may be stuff that I completed a couple weeks ago. I am currently on the t-molding phase of the main body.
Subscribe to:
Posts (Atom)